Monday, February 15, 2010

The Battle of Prescott's Mill - Aftermath: Part 1

I recently had a chance to play my first game of Warlord Games BLACK POWDER: Battles with Model Soldiers in the Age of the Musket. If you're interested in learning more about the rules, you can read my Review of Black Powder, which is pretty extensive. I'll also include comments on the rules in the following battle report. I will put rules comments in italics to separate them from descriptions of the battle.

Friday, February 12, 2010

Tyranid Termagants with Fleshborers

Continuing my gradual return to painting my Tyranid army, I recently finished up a few of the Termagants that came with the Battle for Macragge boxed set for 4th Edition Warhammer 40K. If anyone else is just now getting around to assembling these guys, I have a warning. It looks like all of them are identical, so it doesn't matter which set of arms you put on which body. But it actually does matter. It matters a lot. They are numbered on the sprue so that you know which set of arms goes with which body, but I thought they were all interchangeable so I cut off all the parts and then cleaned and assembled them, so I didn't have the number to look at. And that was a mistake, because it's hard to tell by looking at them which go together, but there are slight differences.

Wednesday, February 10, 2010

Perry Miniatures Plastic War of the Roses Infantry review and using them in Warhammer Fantasy

I've already done a couple of previous posts reviewing miniatures from companies other than Games Workshop with a focus on how suitable they would be for use in Warhammer Fantasy. My post on the Wargames Factory Vikings can be found here, and my post on the Avatars of War Lord of Chaos model can be found here. Both of those proved to be quite popular posts, so I decided to continue the series.

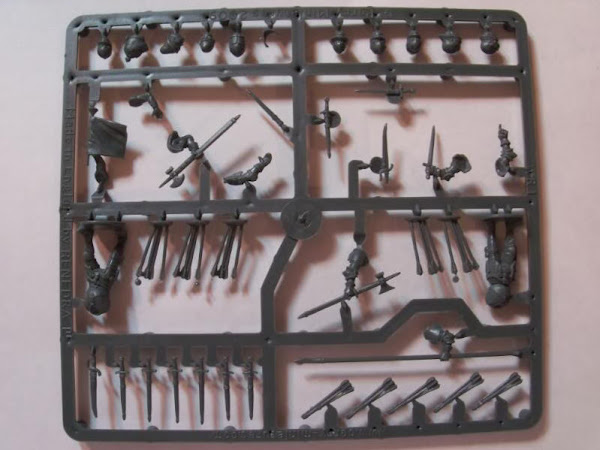
This time, I'm taking a look at the Perry Miniatures War of the Roses plastic infantry set. First off, here are pictures of the two types of sprue. The box includes three of the first type, and two of the second. The first sprue has 12 bodies in various armor, 12 heads some with helmets, 10 sets of bow arms, and 6 sets of pole-arm arms. The second sprue is for making command figures and has two armored bodies, another 10 heads mostly helmeted, pairs of arms for making a trumpeter, standard bearer, and champion with poleaxe, and some extras like bundles of arrows and sheathed swords.
Perry Plastic War of the Roses

The box also comes with a sprue of flat plastic bases in various sizes, and a pamphlet. The pamphlet has some introductory information about the War of the Roses, a brief guide on assembling the figures, some drawings of historical uniform color schemes, and some sample flags. All of this is completely useless for someone intending to use these figures as Warhammer substitutes, but I suppose they might be nice for people that are buying them for their intended purpose.

The assembly guide is extremely brief and with good reason. The figures are very easy to assemble. They had very slight mold lines that were easy to clean, and putting them together so they look good is pretty simple. To me, this can be both a good and a bad thing. If you just want them together quickly and don't like assembling or converting figures, it's great. But if you like plastic figures because of their potential to convert and customize, there isn't as much opportunity for that with these as with some other plastic figures. For example, the Wargames Factory Viking figures, which I reviewed here, were a lot more fun to put together. This is because they are much easier to assemble in different poses and really make unique. The Perry War of the Roses figures seem designed with very limited and specific poses in mind, especially with the two-arm halberd pieces. Even the bow arms come in pretty specific pairs with a clearly intended position. So if you really like assembling and converting plastic figures, this set might not be for you. If you hate putting them together and just want nice looking figures that are done quickly, it's perfect.

They do look very nice, with very crisp detail and good proportions. Definitely very good figures. And the plastic set does allow some degree of variety, though not as much as you might think. Just like many of the arms go in clear pairs to be used together, also many of the arms are somewhat limited in the bodies you can put them on and still have it look right. Like chainmail arms with armored bodies, and that sort of thing. Not a huge issue, but it does mean that you can't combine any set of arms with any body and get a result that looks good, so the possible combinations are limited in that way. And the poses are somewhat limited, as I said. There are several extra heads, so you can definitely add variety that way so that even with many boxes you can make it so that no two figures share all the exact same parts. And this is probably enough variety for most people.

So, will they work as Warhammer Fantasy Empire stand-ins? Well, here is a picture comparing the size of some of the Perry War of the Roses plastic pieces with some old Empire Halberdier bits. The Perry pieces are the darker plastic. As you can see, the Perry pieces are much more correctly proportioned, in particular the size of the hands, heads, and weapons is much bigger on the Warhammer Empire figures. Aside from that, they are pretty close in size, but this is also an older, and relatively less bulky, figure in the Empire line. I didn't bother trying to make a figure by combining Games Workshop parts and Perry parts, since it obviously would have looked pretty bad having such huge arms on such a thin body.
Perry Plastic War of the Roses vs Warhammer Fantasy

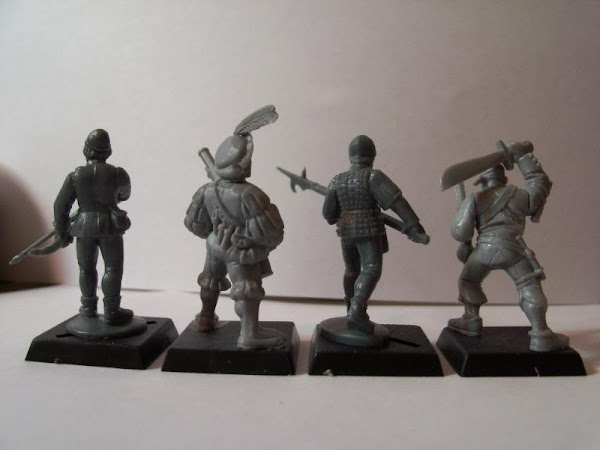
And here are some pictures of a couple of assembled Perry plastic War of the Roses figures, one archer and one Halberdier, next to some Warhammer Empire figures, a plastic Handgunner and multi-part plastic Free Company. From a size comparison standpoint, I think it's borderline whether these fit in. I think it would be up to individual taste and judgment. The height is about the same, except that the perry figures are all moved higher by their built-in base. And the Perry figures are a lot more slender than the Games Workshop ones, even more so than the Wargames Factory Vikings, whose bodies are at least a little closer in bulk. And the extra height added to the Perry figures by their base makes them look even more lanky in comparison. If you only had the old Empire state troops which aren't as bulky, they might look better together. I don't have any of the newest multi-part plastic state troops, so I'm not sure how those compare.
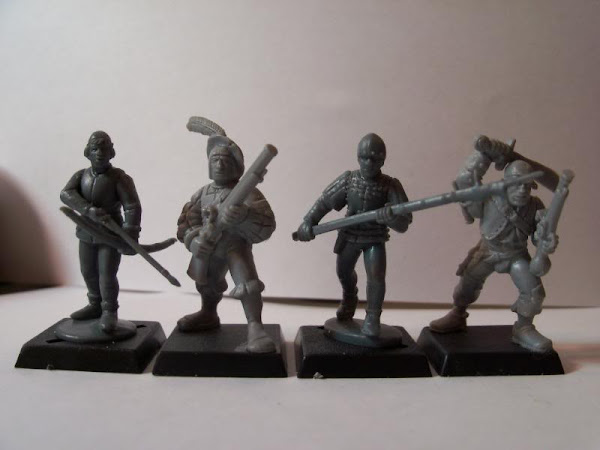
Perry Plastic War of the Roses vs Warhammer Fantasy

There are also other problems with using these in an Empire army, mostly having to do with the composition of the sprues. There aren't enough halberds/bills or bows to arm all the figures with the same type of weapon, so you'll be making a mixture of Empire Halberdiers and Bowmen - up to 18 halberdiers or up to 30 bowmen per box of 40, since there are more arms than bodies. However, Halberdiers are supposed to have light armor, and archers no armor. Looking at the bodies in the Perry set, they have all kinds of different armor on in a spectrum from nothing to fully armored. So if you want your Bowmen and Halberdiers to look like the have the right kind of armor, it might be difficult to make the distinction. Maybe the best thing would be to use all the bodies that look like they have no armor or with it under their clothes make into bowmen, everybody else except the four fully armored figures would then be Halberdiers, but I'm not sure there are enough halberds to do that. Even if there are, it removes any option for how many of each kind to make, and you still have those four fully armored figures that you'll have to find some other use for, as they'd really stick out in a unit that is supposed to have just light armor.

So, there are definitely some hurdles to get past if you want to make some Warhammer Fantasy Empire units out of these. Since I really dislike the current Empire range of miniatures from Games Workshop, I think I can live with these instead. In short, if you are getting these to use for their intended purpose as War of the Roses miniatures, they are an excellent set of figures. If you want them to use in your Warhammer Fantasy Empire army, they are less than ideal.

Monday, February 8, 2010

Tyranid Spore Mines

With the recent release of the new Tyranid codex, I've lately started working on getting more of my Tyranid army painted. Since I haven't painted any Tyranids in a long time, I figured I should start small and work up to the bigger things after I'd gotten my color scheme and technique down. I also didn't want to assemble or paint anything that had a lot of options before the codex came out, since I wasn't sure what options I'd want to have until I got a chance to read the codex.

So with that in mind, I started out with some simple Spore Mines. I had some metal Spore Mines from some old Biovores, plus some plastic ones that came with the Battle for Macragge boxed set for 4th edition Warhammer 40k. So while I was waiting for the book to come out to decide what else I would paint and what it would be armed with, I painted up the Spore Mines.

Friday, February 5, 2010

Grismeire Valley Campaign Turn 1 - Vampire Counts vs High Elves Challenge Game

For our Warhammer Fantasy campaign, we decided that if two opposing players weren't fighting any battles specifically as part of the campaign that turn, they could fight a "challenge game". These games would have no impact on the outcome of the campaign, but would be used to add to the story. During the first turn, while the Bretonnian player battled the Beastman player, the Vampire Counts and High Elves players fought a challenge game.

As their main forces advanced through the Grismeire valley, the scouting parties of the Vampire Counts and High Elf forces came into contact near a long abandoned farmhouse in the countryside. Both forces were small, but as it was their first contact with the enemy, both sides were eager to fight, and battle was joined.

The Vampire Counts scouting party was accompanied by Byron Manfred's former master in the Amethyst order, now an insubstantial Wraith. The Wraith and his retinue hovered around the abandoned farmhouse, which seemed to hold a strange attraction for them. The shimmering magical weapons of a unit of Swordmasters banished all of the spectres, but the rest of the Vampire Counts force completely outmaneuvered and utterly crushed the High Elves. It was a massacre, and none of the High Elf scouts would be returning to report on their enemy's movements.

Wednesday, February 3, 2010

Avatars of War Lord of Chaos review

My post about using Wargames Factory plastic Viking miniatures in Warhammer Fantasy proved to be very popular, so I've decided to do more articles about using alternative miniatures in games of Warhammer. This time I'll be reviewing the Avatars of War Lord of Chaos figure.

Avatars of War makes a bunch of models that seem designed to be used as characters in games of Warhammer Fantasy. So, not surprisingly, they scale and style of them match up really well with the existing Warhammer range, and the Lord of Chaos comes with the appropriate 25mm square base. When ordering, you have some options when it comes to how you want the model armed. The right hand can have either a sword or a hammer, and the left hand either an axe or a shield. I thought the sword and the shield both looked pretty awful, so I went with the hammer and axe. All varieties come with two head options, so you can pick one and have a spare to use for something else.

The model in general is pretty cool looking, and it is similar enough in style to the Games Workshop Warriors of Chaos range to fit in really well, but different enough to be unique and interesting. It's a decent option if you don't really like the existing Games Workshop Chaos Lord options, or you want something that will stand out from other Chaos Characters you already have.

There are some downsides, however. First of all, it doesn't seem like it saves you any money over buying the Games Workshop models. Usually one of the benefits to finding alternative models for Warhammer is that they are less expensive, but not in this case. So it's only worth it if you actually like the miniature much more than the available Games Workshop ones, or really want something different.

The model itself doesn't fit together particularly well. The surfaces that need to be glued together aren't flat and don't sit flush together, so it is difficult to assemble the model. I had to pin the right hand to get it to stay on, and I will probably regret not pinning the head on. Also, some of the details on the model, in particular the chain mail parts, are shallow and not well defined. Aside from that the sculpting is pretty good, except that the entire back of the model (which you can see in the pictures below) is really boring. The front looks cool, but the back is completely covered with a huge cape that has the same texture all over.

Speaking of which, that cape sticks out pretty far to the side, which will make it difficult to rank this figure up in a unit. This might not have been so bad if I had put this guy on a Games Workshop base with the slot running horizontally, instead of the base Avatars of War supplied for the figure, which had a diagonal slot. The Avatars of War website seems to show them ignoring the slot, clipping off the tab below the model's feet, and gluing the feet directly to the base. This might prove difficult, however, as the feet don't seem to lay completely flat on the same plane as each other.

Anyway, you can see for yourselves. Here are some pictures of the Avatars of War Lord of Chaos between two Games Workshop Chaos character models I already owned.
Avatars of War Lord of Chaos

You may be asking yourself: if I already had at least two Chaos Lords with two hand weapons, why did I feel the need to buy yet another one armed the same way? That I shall leave as an exercise for the reader.

Monday, February 1, 2010

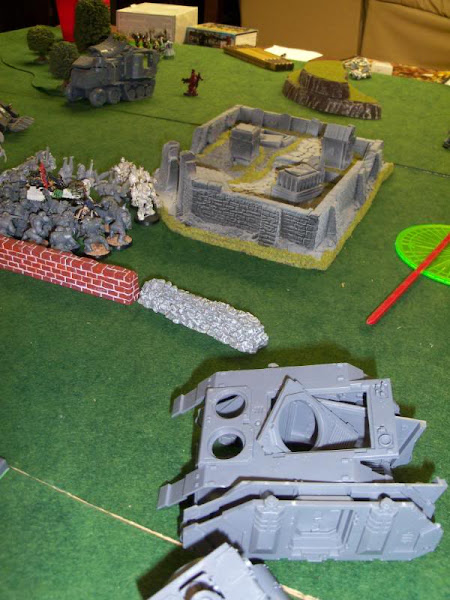
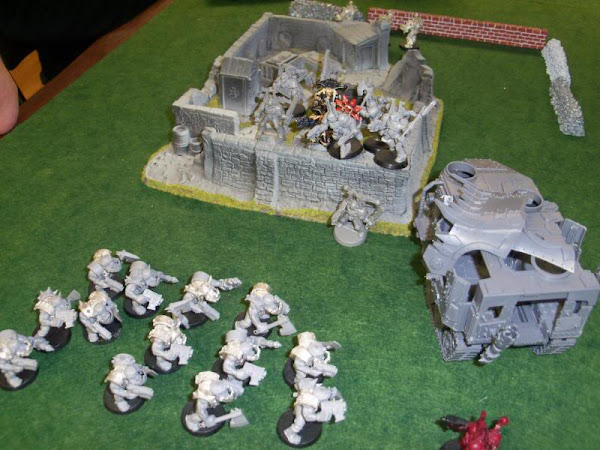
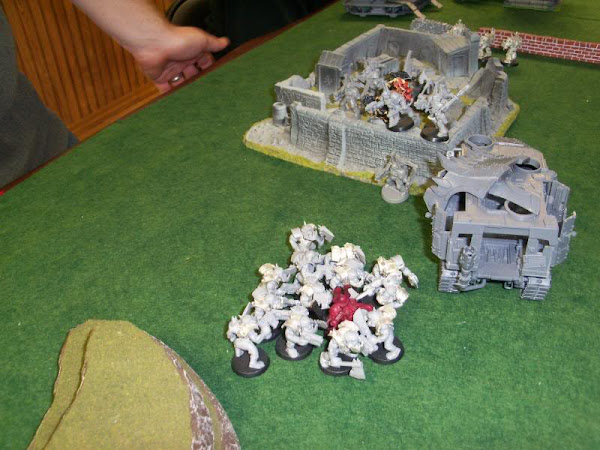
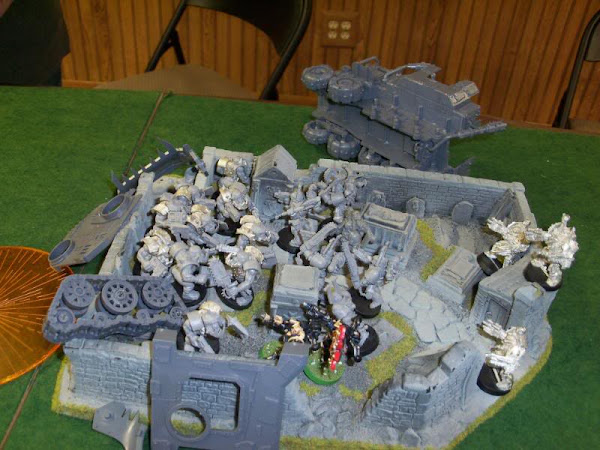
Warhammer 40,000 Battle Report: The Battle of Zagstruk's Head - Part 2

This is Part 2 of a Warhammer 40,000 battle report between Orks and Chaos Space Marines. You can read Part 1 of the battle report here. After the first two turns, the Orks had solid control of the Chaos objective with their unit of Mega-Armored Nobz. The Chaos Marines had suffered a lot of casualties, and now they could only hope to capture the Ork objective and pull out a draw. So all of their remaining forces were surging towards the Ork held graveyard to capture the Head of Zagstruk.

Chaos Marine Turn 3
The Khorne Berzerker unit on the far left flank of the Chaos Marine army was down to one remaining member. And he was mad. After the rest of his unit had been burned to death by the Burna Boyz, he decided it was time for revenge. He charged the five Burna Boyz, screaming in rage, and instantly cut down half of them. The rest of the terrified Orks fled in panic and were shot in the back as they ran. Nearby, the unit of Boyz fighting the remaining Obliterator did a single wound, and the Obliterator killed a couple of them in return.
Warhammer 40k Orks vs Chaos Marines battle report

Back in the middle of the battlefield, the Chaos Marines got more reinforcements. Another unit unit of Obliterators, this one three strong, teleported down right next to the graveyard. They were exactly on target thanks to the nearby Icon of Khorne. With the Obliterators to deal with the Orks in the graveyard, the unit of Crusaders marines and the last remaining unit of Berzerkers were free to come to the aid of their commander, who was surrounded by over 20 Ork Boyz.
Warhammer 40k Orks vs Chaos Marines battle report

The Obliterators opened up on the Boyz in the graveyard with twin-linked flamers, killing every single one and adding many new charred bodies to the carnage.
Warhammer 40k Orks vs Chaos Marines battle report

The Crusaders and the Berzerkers assaulted the unit of Boyz, slaughtering almost all of them as they fought their way in toward their beleaguered Chaos Lord. It was not enough, however. A single remaining Nob with a power claw managed to sneak up on the Lord and bash him apart with a single blow. But with most of his unit gone and now surrounded himself, the Nob tried to flee and was cut down in the sweeping advance.
Warhammer 40k Orks vs Chaos Marines battle report

Orks Turn 3
Seeing an inviting target, the Ork Battlewagan floored it and rammed the nearest Rhino in the side at full speed, but did no damage. The Tankbustas were one again ineffective. The Orks also got some reinforcements, as three DeffKoptas came on from the Ork left, but coming from so far away their weapons were not yet in range.
Warhammer 40k Orks vs Chaos Marines battle report

The Looted vehicle once again managed to miss with its Battle Cannon. The Warboss with his bodyguard advanced on the Crusaders and opened fire. With some uncanny shooting, they managed to gun down both of the Flamer-armed marines before they ever had a chance to fire their brutal weapons. The Stormboyz charged the full unit of eight Khorne Berzerkers, who were just hitting their stride and easily slaughtered all the charging Stormboyz before they could even attack. The Warboss's unit charged the Crusaders, but only a few were able to reach them, so there were few casualties and both sides piled in. The combat with the Obliterator continued, as the Orks couldn't manage to finish him off, and he killed another couple of them.
Warhammer 40k Orks vs Chaos Marines battle report

Chaos Marine Turn 4
The still unscathed unit of Khorne Berzerkers moved up to come to the aid of the three remaining marines of the Crusaders chapter, who were outnumbered in combat more than 5 to 1 and facing the Ork Warboss. The full unit of three Obliterators moved around the cemetery wall to get clear shots at the largely ineffective looted tank. Their well-aimed Multi-Melta blasts caused the vehicle to explode in spectacular fashion, ending the looming threat of the battle cannon.
Warhammer 40k Orks vs Chaos Marines battle report

The Berzerkers charged into the combat with the Warboss and his retinue, killing most of the Orks. Between the remaining Orks and the Warboss, they only managed to kill a single Crusader. The furious charge of the Berzerkers must have had them thinking more about escaping than attacking. They knew they couldn't win this fight and tried to escape, but were cut down in the sweeping advance. Elsewhere, the last remaining, and largely intact, unit of Ork Boyz finally finished off the Obliterator they had been fighting. (We kept track of the total number of attacks it took these Orks to take out the two Obliterators. I don't remember the exact figure, but I think it was somewhere around 200. They took out the first one with their first 71 attacks, so it took around another 125 attacks to finish that second Obliterator) After the combats, the Ork Boyz and the Chaos Marines all consolidated toward the cemetery that lay between them.
Warhammer 40k Orks vs Chaos Marines battle report

Orks Turn 4
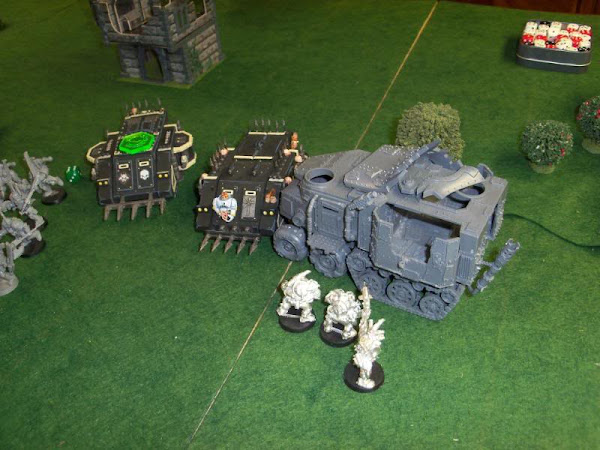
The Ork army didn't have many units left, but they did have a completely intact Battlewagon. The large unit of Boyz that had just finished off the Obliterator moved forward, and the Battlewagon drove over towards them ready to pick them up next turn if they wanted a ride. The determined Tankbustas advanced towards the two Chaos Rhinos, but before they could do anything the Mega-Armored Nobz fired their rockets at the immobilized Rhino. Firing at a big, stationary target, they easily hit some vital locations and destroyed the vehicle. The Tankbustas opened fire on the remaining Rhino, but couldn't manage to hit it.
Warhammer 40k Orks vs Chaos Marines battle report

The Tankbustas then continued forward to assault the remaining Rhino. Barely reaching the vehicle as it tried to evade them, a lucky grenade detonation penetrated the ammunition storage and caused the tank to explode, killing all of the Tankbustas. But at least they died doing what they loved. Elsewhere, the DeffKoptas fired their rockets at the three remaining Crusaders, but only one was killed as the other shots exploded against the nearby brick wall.
Warhammer 40k Orks vs Chaos Marines battle report

Chaos Marines Turn 5
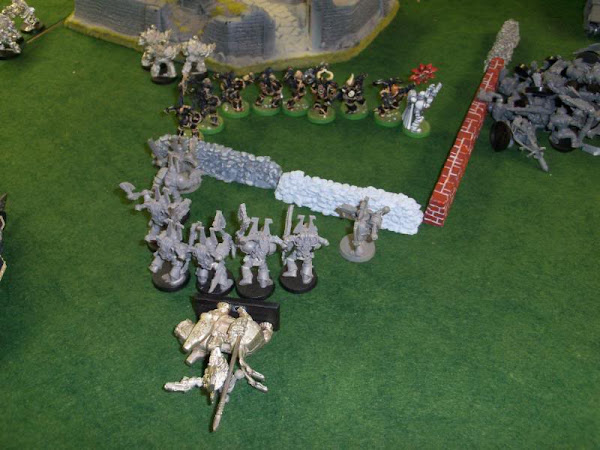
Things were moving at a furious pace now. The two remaining Crusaders and the full unit of eight Berzerkers ran at full speed through the graveyard. Struggling over mounds of charred and dismembered bodies, the still managed to reach and surround the crypt containing Zagstruk's head. Or so they assumed, as with all the body parts strewn about, it would be hard to locate Zagstruk's head, assuming they could even discern it from the head of any other Ork. But no matter. The lone remaining Khorne Berzerker from the other squad, still in a rage, charged at the large unit of nearby Boyz, but they proved too numerous for him and he only manged to kill one or two before they dragged him down.
Warhammer 40k Orks vs Chaos Marines battle report

The three Obliterators advanced towards the annoying DeffKoptas and exploded all three of them with well-aimed shots of lethal radiation from the Multi-Meltas.
Warhammer 40k Orks vs Chaos Marines battle report

Orks Turn 5
Seeing that their force had been almost completely annihilated, the Ork Boyz sensed that time was running short and opted for a desperate maneuver to try to save Zagstruk's head from being captured. The mounted up in the Battlewagon and yelled for the driver to plow full-speed through the brick wall and into the cemetery to stop directly over Zagstruk's grave. The Chaos Marines were forced to back off in the face of the insane maneuver and could now not reach Zagstruk's head, so the desperate move had paid off.
Warhammer 40k Orks vs Chaos Marines battle report

(At the end of Turn 5, we rolled for random game length. Had the battle ended then, it would have been an Ork victory, since with the Battlewagon blocking the Ork objective, none of the Chaos Marines were within three inches of it. We rolled, and the result was another turn, giving the Chaos Marines another chance to pull out a draw.)

Chaos Marines Turn 6
Things were getting desperate now, and all could sense that time was running short. The three Obliterators managed to make their way to the edge of the graveyard to get clear shots at the Battlewagon, and fired again with their trusty Multi-Meltas. The Battlewagon exploded violently, killing a few of the Boyz inside. The Crusaders and Berzerkers fired their Bolt Pistols at the remaining Boyz, killing several more. The few that remained weren't going to stick around to be assaulted, and scrambled out of the wreckage to flee away from the battlefield. The Crusaders and Berzerkers had recaptured the objective, though Zagstruk's head was now covered by even more Ork bodies, as well as the flaming wreckage of the Battlewagon.
Warhammer 40k Orks vs Chaos Marines battle report

Orks Turn 6
The only remaining Orks on the battlefield, the Mega-Armored Nobz, called their Truck over to shield them from fire as they collected their spoils. The battle came to an end, with both sides having captured their opponent's objective, resulting in a draw.
Warhammer 40k Orks vs Chaos Marines battle report

This turned out to be an incredibly fun battle, with an extreme amount of carnage on both sides. Out of the two 2000 point armies, all that remained at the end were 4 Mega-Armored Ork Boyz with their truck, 7 Khorne Berzerkers, 2 regular Chaos Space Marines, and 3 Obliterators. The shredded bodies of 16 Chaos Marines are strewn about the Chaos Icon next to the Book of Sorcery, and there are somewhere around 120 bloody or burned corpses in or around the cemetery. The battle also went right down to the wire, and ended in a draw. You can't ask for a better result than that. And considering that it ended in a draw, and that the Chaos Marines need to get their book back, and the Orks (for whatever reason) don't want them to have Zagstruk's head, I hope sometime to do a sequel to this battle.