Tuesday, June 21, 2011

Warhammer 40,000 Battle Report: Eldar vs Chaos Space Marines

The Setup
This was a 1500 point standard Warhammer 40,000 game, pitting Eldar against Chaos Space Marines. It used the standard missions and deployment from the rulebook. The objective of the mission was simply to gain more Kill Points than the enemy. Deployment 12" on to the long table edges. The Eldar deployed first and would have the first turn.


Warhammer 40k Eldar vs Chaos Space Marines

The Story
Renegade Space Marines of the Crusaders chapter are assisting a rebellion on an Imperial world, as they are wont to do. Pursuant to such, they have destroyed and then desecrated an Imperial church, along with some other outbuildings. Having done so, they are now occupying the area whilst a Thousand Sons aspiring sorcerer amongst them prepares an arcane ritual. This ritual, like any good arcane ritual, requires the sacrifice of a beautiful, scantily-clad woman. In truth, it probably just requires any old human sacrifice, but given the choice, why not choose the beautiful, scantily-clad woman?

And so the sorcerer has, and said woman is now chained up awaiting her fate. Unbeknownst to all, an Eldar Farseer has taken an unusual interest in the fair maiden (though to any who've seen her, the interest taken is perfectly understandable). The Farseer has examined the threads of future destiny, and decided that he needs to rescue the sacrificial woman. Perhaps saving her life on this day will result in many Eldar lives being saved in the future (probably the lives of all the Eldar he imagines he'll be fathering with her once he rescues her). At any rate, he doesn't have to explain himself to anyone and, furthermore, if he says the future of the Craftworld depends on saving some hussy, then save her they shall.

Turn 1
The Renegade Marines were pretty focused on their pillaging, so the Eldar managed to sneak up pretty close to them before being noticed. Once spotted, however, they were still out of range with most of their short-ranged weapons, so they all moved forward to close the distance. The sole exception was the rangers, who were in a good position and fired with their sniper rifles, but caused no wounds. There must have been a gust of wind.

Warhammer 40k Eldar vs Chaos Space Marines

In response, the Berzerkers in the remnants of the church struggled through the rubble towards the now visible Dire Avengers, not realizing the epic struggle they were about to engage in. Most of the rest of the marines held their ground and fired, with the Predator causing a few casualties in the Farseer's bodyguard of Warlocks. The Thousand Sons, in the Rhino on the right flank, drove up to the other side of the Altar to protect it.

Warhammer 40k Eldar vs Chaos Space Marines Warhammer 40k Eldar vs Chaos Space Marines

Turn 2
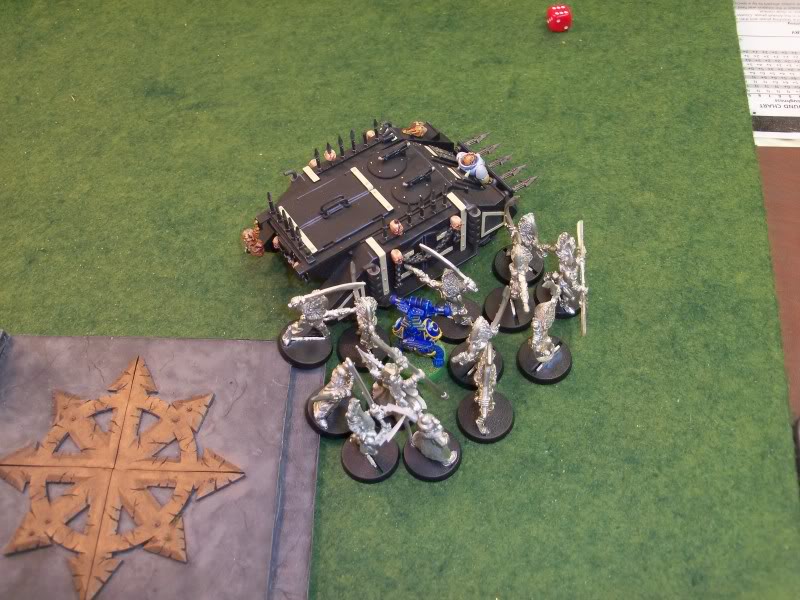
Appearing from out of the warp, a unit of aptly-named Warp Spiders destroyed the Rhino containing the Thousand Sons, forcing them to disembark. They jumped again to add some distance between them and their foes, but return fire from the Thousand Sons and Crusader marines nearby killed several of them. The rangers found their range, and managed to kill a couple of the Crusader marines on the hill by the altar.

Warhammer 40k Eldar vs Chaos Space Marines

In the middle of the battlefield, the ponderous advance of the Wraithguard was held up when two Obliterators (in this case, renegade Techmarines) teleported in directly in front of them. They opened fire with everything they had, aided by the Marines in the woods behind, but after the barrage most of the wraithbone constructs still stood.

Warhammer 40k Eldar vs Chaos Space Marines

On the Renegade Marine left flank, the Dire Avengers fell back while firing at the Berzerkers, killing two of them. That really annoyed the Berzerkers, and they continued their headlong charge at their foe.

Warhammer 40k Eldar vs Chaos Space Marines

Turn 3
With well-practiced precision, the Dire Avengers again fell back, staying just close enough to keep the Berzerkers in range, and felled two more of them. Now the Berzerkers were getting angry. They fired a few bolt pistol shots at the Dire Avengers, but to no effect.

Warhammer 40k Eldar vs Chaos Space Marines

In the center, the Wraithguard all fired on the Renegade Techmarines, but only killed one of them thanks to their powerful force fields. A unit of Swooping Hawks landed, dropping enough grenades to kill a couple of the marines on the hill near the altar. The Swooping Hawks then immediately fled the battlefield upon taking a few casualties from return fire.

Warhammer 40k Eldar vs Chaos Space Marines

Having failed to eliminate the last Techmarine with warp-tearing energy fired from their Wraithcannons, the Wraightuard charged in to beat him to death with them instead. The Warlock leading them was crushed to death by the Techmarine, but the Wraithguard fought on, only managing to wound their adversary.

Warhammer 40k Eldar vs Chaos Space Marines

On the right of the Renegade Marine battle line, the Howling Banshees and the Farseer with his Warlock bodyguards sprinted full speed to assault the Thousand Sons marines near the altar. It doesn't take a powerful Farseer to predict how that turned out. However, one tenacious Thousand Son did survive the initial onslaught, and so prolonged his twisted semblance of life for another few seconds.

Warhammer 40k Eldar vs Chaos Space Marines

Previously, a unit of four Terminators, one with a Heavy Flamer, teleported down in the rear of the Eldar force to take out the pesky rangers. Unfortunately, they arrived far off target. They had, however, drawn the fire of the Rangers, who only managed to take down one of the Terminators. Undeterred by the loss, they advanced to within Heavy Flamer range and roasted most of the Eldar Rangers in an instant. The four remaining Rangers bravely, though foolishly, held their ground.

Warhammer 40k Eldar vs Chaos Space Marines

Turn 4
The Howling Banshees, Farseer, and Warlocks easily put an end to the one remaining Thousand Son, and advanced toward the Crusader Marines on the nearby hill. Sprinting at full speed, both Eldar units charged into combat with the Marines before they could get off a volley. Most of the Marines were cut down in a blur of flashing power weapon blades. Only the Lord and an Aspiring Champion survived long enough to kill the two Warlocks, before fleeing for their lives. The Eldar let them go, intent on the bigger threats still remaining.

Warhammer 40k Eldar vs Chaos Space Marines

Shuriken catapults blazing (or whatever they do), the Dire Avengers charged into the Khorne Berzerkers. Normally this would seem pretty foolish, but the Berzerkers, finally enraged by the Eldar continuously staying out of assault range, had sprinted so quickly towards their enemy that there was simply no more room for the Dire Avengers to fall back. Knowing that they would soon be caught by the frothing, charging Berzerkers, they elected to reverse direction and charge, hoping the element of surprise would bring them victory. This was not to be. They only killed one of the Berzerkers, while three of them fell. Undeterred, they held their ground and the fight would continue.

Warhammer 40k Eldar vs Chaos Space Marines

Meanwhile, the six Wraithguard were unaffected by the loss of their Warlock leader. With the determination of soulless constructs, they managed to beat to death the renegade Techmarine.

Warhammer 40k Eldar vs Chaos Space Marines


Turn 5
The Howling Banshees ran up to the crest of the hill, but were still too far from the Marines in the woods to assault. The Farseer examine the twisting paths of potential futures, and determined that he didn't want to be shot by the two Heavy Bolters and the Autocannon on the nearby Predator. With the psychic power of his Witchblade, the managed to destroy the tank. The Marines in the woods couldn't see the Farseer, and so again fired at the advancing Wraithguard, cutting down three more of them. Elsewhere, the Berzerkers slaughtered the remaining Dire Avengers, and the Terminators easily finished off the few remaining Rangers. The forces on both sides were severely depleted by this point. However, it is not in the nature of the Crusader marines to hold ground long, and the time had come to withdraw.

Warhammer 40k Eldar vs Chaos Space Marines


The Result
The Eldar force destroyed a Rhino and a Predator, wiped out a unit of Thousand Sons and the unit of "Obliterators", and broke the Chaos Lord and a unit of marines for a total of 6 kill points. The Renegade Marines wiped out the Dire Avengers, Rangers, Warp Spiders, and the Farseer's retinue, and broke the Swooping Hawks, which gave them only 5 kill points. A victory for the Eldar, as the Renegades were forced to withdraw, leaving the sacrificial maiden in the hands of the Farseer.

Warhammer 40k Eldar vs Chaos Space Marines

Monday, June 13, 2011

Pendraken Napoleonic Russian, Wurttemburg, and French miniatures

The folks at Pendraken Miniatures were nice enough to send me a few samples of some of their 10mm Napoleonic figures. I had mentioned somewhere on The Miniatures Page that I might be interested in getting some of the Pendraken Napoleonic Russian and Wurttemburg figures, but didn't want to buy a lot of them without knowing what they look like, and there are no pictures on their website. So the helpful Pendraken people offered to send me a few samples to get an idea of what they're like. They also threw in some samples of their latest 1809 French figures. So I thought I'd be helpful back, and post some pictures so others can see what they look like.

Before taking the pictures, I cleaned any mold lines and flash from the figures and primed them with white primer. I then applied some Games Workshop Black wash to the figures, so that the details would show up better in the photographs. I think the wash is a little thick for such small scale miniatures, because there are quite a few places where it didn't get in all the recesses. Hopefully it worked well enough to make the details easier to see.

First up are the sample figures from the Moscow Campaign Wurttemburg line. Here you can see one of the regular Infantry figures (I'm assuming this is the "March Attack" pose), and three command figures. In general, I'm assuming there is only one sculpt for each thing, so all the infantry in the same pose will be identical, and all the drummers identical, etc. But I'm not sure.

Pendraken Miniatures Napoleonic Moscow Campaign Wurttemburg Infantry Pendraken Miniatures Napoleonic Moscow Campaign Wurttemburg Infantry
Pendraken Miniatures Napoleonic Moscow Campaign Wurttemburg Infantry Command Pendraken Miniatures Napoleonic Moscow Campaign Wurttemburg Infantry Command

Next are the sample figures from the Moscow Campaign Russian range. First is a standard line infantryman, and again I assume this is the "March Attack" pose. Next is a couple of Cavalry figures.

Pendraken Miniatures Napoleonic Moscow Campaign Russian Infantry Pendraken Miniatures Napoleonic Moscow Campaign Russian Infantry
Pendraken Miniatures Napoleonic Moscow Campaign Russian Cavalry Pendraken Miniatures Napoleonic Moscow Campaign Russian Cavalry

Both of these ranges are okay. They are very sturdy and have well-defined and probably easy to paint details, which is very nice. On the other hand, they are pretty chunky, with the Russian Cavalry in particular having freakishly large heads. That seems pretty normal for many ranges in 10mm or 6mm. I prefer more realistic proportions, but then of course the miniatures will be much more frail.

The thing that I really don't like is the strange pose on the marching infantry. Their legs look like they're way too far apart. They look bow-legged. The other thing I don't like, which just makes no sense at all, is that the Wurttemburg infantry are on really thick bases. They'll look like they're all walking on rock. Of course, I could work around that, except that the Russians are on really thin bases. So I'd either have to put all the Russian infantry on something thick to make up the difference, or it'll look like the Wurttemburgers just tower over the Russians, especially with the combination of their tall helmets and always making sure to stand on a big rock. And with both ranges being for the Moscow campaign, I would think it likely for these to be used together, so I'm not sure why there is such a big difference in their base thicknesses.

However, I'm not aware of any other company that makes 10mm Wurttemburgers, so I suppose I'll have to overlook my minor complaints. But since the Pendraken Russians don't match well with their own Wurttemburgers anyway, maybe I'll shop around and see if I can find other Russians I like better. I doubt that Wurttemburgers are huge sellers, so I won't hold my breath for any new ones being sculpted.

Now, to move on to a more recent range. I don't know when those Moscow Campaign figures were sculpted, but the Pendraken 1809 French range is pretty new. First is two of the figures from the Engineers pack, then an infantryman, and finally a couple of cavalry figures. Really, the pictures on the Pendraken site for this range are WAY better than mine, so you'd be much better off looking there. I just figured I'd include them anyway.

Pendraken Miniatures Napoleonic 1809 French Engineers Pendraken Miniatures Napoleonic 1809 French Engineers
Pendraken Miniatures Napoleonic 1809 French Infantry Pendraken Miniatures Napoleonic 1809 French Infantry
Pendraken Miniatures Napoleonic 1809 French Cavalry Pendraken Miniatures Napoleonic 1809 French Cavalry

These are really nice. I think the sculpting has improved greatly. The marching infantry pose is much better, and the cavalry have much more dynamic poses. The figures also seem a little less chunky. I think the proportions are better, while still managing to keep a lot of crisp details. Unfortunately I don't need any 1809 French, but if I did I would certainly consider this range.

For those interested in this kind of thing, with a little filing of bases I think I could just fit four of the marching infantry side by side on a 3/4" wide base. I do like to base dense so it looks like an actual line. Still, if I use these figures I might just do 3 wide per 3/4" of base width, or 4 wide per inch. Then I could do the Russians on 4 bases (one per company) that are 1.5" wide each with 6 figures across, and the Wurttemburgers on 6 bases (one per company) that are one inch wide each with 4 figures across. Then it would work out to 6 inches across for both in line, with the same number of figures across as each other.

For anyone interested in Great War gaming, I've also done a post with pictures of some of the Pendraken World War 1 Miniatures.

Friday, June 10, 2011

Grismeire Valley Campaign Turn 4-1

The High Elf 1st army, led by Lord Tethelion of Caledor himself, was disordered and scrambling for a place to regroup and refit their army. Wary of the powerful Elf lord, and not wishing to allow him to get his personal guard back into fighting condition, the Vampire Counts armies set about securing all the villages in the area that Lord Tethelion could retreat to.

The Vampire Counts 2nd Army marched south to capture Nice and the nearby bridge, which could be a very important strategic point as it was the only crossing of the Grismeire river that far south. The Vampire Count 3rd Army moved south to occupy Chateau D'If, destroying all the crops in the fertile farmland surrounding it.

The Vampire Counts 1st Army attacked St. Mer-Eglise, which had been recently captured by the High Elf Blue army from the last of the Beastmen. The High Elves hadn't had much time to prepare defenses in the ravaged village. Through careful and meticulous maneuvering, the undead army managed to force the High Elves to withdraw from the village, though they sustained few losses. And those losses would soon be made up from the remnants of the High Elf Purple army, so that they would soon be back to full strength. The Vampire counts had, however, succeeded in taking the village and denying Lord Tethelion's forces any place to regroup from.