Showing posts with label terrain. Show all posts

Monday, August 28, 2017

Leven Miniatures 6mm ACW Buildings

I recently finished painting up a few 6mm resin American Civil War buildings produced by Leven Miniatures. I bought mine from The Wargaming Company booth at the Little Wars Convention.

Since my American Civil War miniatures are 10mm, the 6mm buildings do represent something of a compromise between the figure scale and the ground scale. Because of this they look too small for the figures, but take up a more reasonable amount of space on the table. I thought 10mm buildings would just take up too much space and dominate the rest of the terrain. Even with 6mm buildings, obviously each building needs to represent more than one building given the amount of ground it takes up. For convenience, I intend each building to represent enough buildings to be occupied by one regiment during a game.

I think the end result looks pretty good, given that there is almost always going to be this compromise between figure scale and ground scale for buildings. Even playing games in say 28mm where each figure represents an individual, buildings tend to be in scale when it comes to height, but take up a much smaller footprint than the actual building would.

This was my first time painting small scale buildings, and it was a challenge. I'm sure there are just some different techniques that could be used to make small scale buildings look a lot better than these, but I'm not sure what they are. Below you can see some pictures of the newly painted buildings along with some of my roads, fields, and an infantry regiment. Have a look and let me know what you think of the painting and the scale difference.

Monday, September 26, 2016

Simple 10mm Roads and Fields

I have needed some dirt roads and farm fields for my 10mm American Civil War games for a while now, but I generally find it hard to get excited about making terrain. With my limited hobby time, I didn't want to spend a ton of time making roads and fields. However, I really needed some to make convincing layouts for my games, so I decided to just try something really simple and see how it turned out.

I had a lot of felt stored up, in green and a few different shades of brown. So I figured I'd see what I could do by just starting with that as a base. With very little time or effort, I ended up with something that looks convincing enough. Not only was it quick, it was also easy enough that my almost 3 year old daughter could help with it, which meant I could actually find the time to do it.

Monday, March 16, 2015

4Ground pre-painted MDF Russian Rural Cottage

I saw this pre-painted MDF building kit from 4Ground on sale, and decided to take the opportunity to give MDF terrain a try. This was my first MDF terrain kit, and I was interested to see how easy it would be to assemble, and what level of detail was possible. Read on for more pictures, assembly tips, and my review of the kit.

Tuesday, April 2, 2013

Gale Force Nine Extra Large Rocky Hill

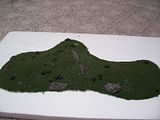
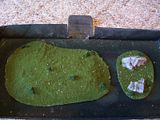
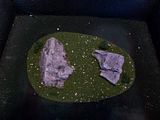
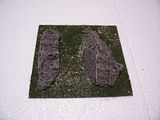
A while ago I picked up the Extra Large Rocky Hill, from the Gale Force Nine "Battlefield in a Box" range. It is large enough to be useful for 28mm games, but could also be used for 10mm, and it is likely intended for 15mm gaming. It came pre-painted and with some static grass and flock to decorate it with. To get it ready for the table, I just glued on the flock and static grass where it seemed to look good, and did a quick black wash over some of the areas of small rocks. I thought this helped add a little depth to those areas that otherwise looked to monotone. I then did a quick spray varnish, and it was ready for gaming. It's a nice, quick piece of terrain. The only problem I have with it, which would prevent me from getting any of the other Battlefield in a Box pieces, is that it doesn't sit quite level on the table. The edges come up off the table in many places, which I don't really like, since it ruins the illusion that the hill is part of the surrounding terrain, rather than plopped on top of it. See below for some pictures, including one with my Warhammer 40,000 Imperial Guard Lieutenant for a size comparison.

Friday, August 10, 2012

Painted Pegasus Hobbies Gothic City Terrain

I got around to painting my Pegasus Hobbies Gothic City Terrain pieces. It was a pretty simple and quick paint job. I first primed everything in black. Then I did a heavy drybrush using dark gray craft paint and a cheap 1" wide brush from the hobby store, followed by a lighter drybrush using a lighter gray color. This turned out pretty well, and I just had to paint a few details. The biggest was painting all the window bars and the metal parts on the door (and lantern/torch fixtures) in Tin Bitz followed by a drybrush of Boltgun Metal to give it an old, rusted metal look.  I painted the tops with Burnished Gold, which took a few coats to cover completely. Then there were just a few other details, like the wood of the door and floor supports, the fire on the torches, and the light of the lanterns.  Here are the results.

Saturday, April 21, 2012

Pegasus Hobbies Pre-Painted River Set and Wooden Fences

A while ago I ordered a couple of the pre-painted terrain sets from Pegasus Hobbies. They are pretty inexpensive and save a lot of time in painting and preparation, so they definitely seem worth it. I got two sets of their river pieces, so that I could stretch across the table lengthwise if I wanted, and some of their wooden fences. Here are some pictures of the terrain with some 28mm miniatures for size comparison. This is only showing one of the two river sets. Each set has two long straight pieces, two short straight pieces, and two 45 degree curves.


And here are some pictures with some of my 10mm Civil War miniatures. This makes the terrain pretty versatile, since I can use it as a stream in 28mm games and a river in 10mm games.


The paint job on these is probably just as good as I would have done painting them, if not better.  And the time it saved make these definitely worth getting. If I had bought unpainted terrain, it would still be sitting on the shelf unpainted, but these are ready to use in a game right away.  Pretty good deal if, like me, you have a big backlog of painting projects or just aren't that good at making or painting terrain.

Tuesday, April 3, 2012

Pegasus Hobbies Gothic City Terrain

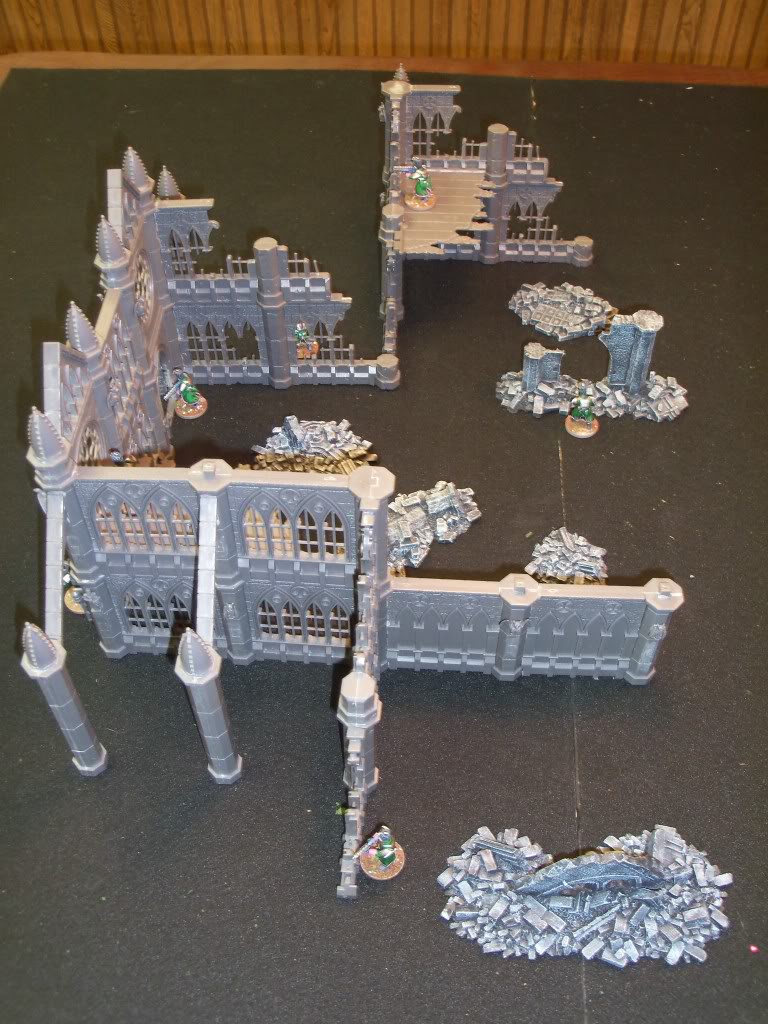
A while ago I got a couple of the Gothic City Terrain kits from Pegasus Hobbies to make some Warhammer 40,000 terrain with. I initially was planning on getting one each of the four different gothic city terrain kits they make to combine into one large building, since I don't like buildings on the table that would only be large enough to be an outhouse in 28mm scale. I actually only ended up getting two of the kits, the Gothic City Buildings Small Set #2 and the Gothic City Ruins. The kits are larger than you'd think, so the result from just those two kits ended up pretty large.

The buildings are decent for the price, though I do have a few warnings. First, it does take a lot of effort to assemble these kits, partly because of the tons of mold lines that need to be cleaned, especially in the windows, but also because some of the pieces just don't fit together quite right without some significant filing. It took a huge amount of filing to get flat surfaces where some of the pieces joined.

Second, the kits aren't nearly as modular as they seem to be. There really is one way they are intended to go together, especially with the ruined walls, and if you do it a different way you are going to have problems. For example, with the ruins, as with all the wall pieces, they look different on one side than the other. But they didn't design it so that you could easily choose which side you wanted to be inside and which be outside. With the other building set, you can assemble them with whatever side you want facing inside, but once you choose, you have to do it all that way. Since the pillars are attached to the wall sections, if one wall piece is set up one way, the next one has to be the same way, so you can't switch the inside and outside walls for different parts.

Anyway, I combined the two kits to get a decent sized piece representing just the front part of a ruined church building. I added in some of the pre-painted Pegasus Hobbies Gothic Rubble sets to have some rubble inside the ruins. Here are some pictures of the results, with a few of my converted Imperial Guard figures for scale.


I didn't glue all of the pieces together, which allows me to partially disassemble it. This was mostly to aid in storage, so it can be broken down to take up less space. But it will also allow me some variety in how I set up the building, or allow me to use just a ruined corner or other individual piece if I don't want something so big. Here you can see how it disassembles and an alternate setup.


And here are a couple shots of the whole thing packed together for storage, so the huge building takes up relatively little space in my closet.


Hopefully this has been helpful for those considering the Pegasus Hobbies Gothic City Terrain sets. If you have any of them, I'd love to see what other people have done with them. You can generally get a good deal and free shipping on these from Amazon:


Here is a link to some other Pegasus Hobbies Products

Tuesday, October 11, 2011

Warhammer Fantasy Temple of Skulls

I've painted up my Warhammer Fantasy Temple of Skulls terrain piece. I decided to buy this after seeing one in person. It is much larger than I expected, and should be a useful piece of terrain for Warhammer Fantasy or 40k.

After assembling it, I noticed that the plastic was extremely smooth. Especially on the big skull parts, which I imagined to be carved out of stone. I wanted a bit of a rough texture, so it would look more natural and more ruined. And it would also make it easier to paint just by dry brushing. To add some texture to it, I mixed some watered down glue and some sand and coated pretty much the entire thing with it. I then tried as best I could to remove it from the spikes sticking out of the columns.

In retrospect, this is probably too much texture. It might have worked better to apply some spray glue, and then sprinkle on a much finer grained sand until it had the coverage I wanted. That would have given enough texture to make it not look completely smooth, without being quite as rough as this, and without covering as much of the piece.

For painting, I started with a black primer. Then I just painted most of it a dark grey color, with a dark brown for the parts I wanted to be dirt. Then I drybrushed with a lighter grey, and a lighter dry brush with an even lighter gray. I put a wash over the dirt to try and give it more of a varied brown tone, but I'm not sure that accomplished much. I also touched up the skulls white, and painted some grey rocks amongst the big dirt areas. The spikes in the column were painted with Boltgun Metal drybrushed with Tin Bitz. I finished it up with some static grass in a few places. Overall, a pretty quick job.

Have a look at the pictures, and let me know what you think. I included some previously painted figures on it, to give a sense of scale, and to add a bit of drama to the scene.

Temple of Skulls Warhammer Terrain

Monday, September 12, 2011

Warhammer Arcane Ruins

I finally got around to painting the Warhammer Arcane Ruins set that I've had sitting around for years. It was a pretty simple paint job. Just started with a black basecoat, drybrushed a dark gray color, then another dry brush of a lighter gray color. I used some craft paints and a one inch wide paint brush I got at a hobby store for pretty cheap. It worked fine. The big bristles on the brush did leave some brush strokes, but on the rocks of these ruins it looks okay.

Here are some pictures of the results.

Warhammer Fantasy Arcane Ruins

Friday, July 30, 2010

Shrine of the Aquila

I've finished painting my Shrine of the Aquila, the first large building I've attempted to paint. It took quite a while, so there are probably much better methods than mine.

I first sprayed the whole thing black. Then I sprayed it gray, but not a heavy enough coat to completely cover everything. Then I drybrushed many of the raised areas with a lighter gray color. Here is where I think I could have saved some time by getting a large quantity of some cheaper paint, and a large flat brush, and just drybrushed the whole thing.

After that, it was mostly details. I painted Tin Bitz paint around all the rivets to make them look rusty, and then painted the rivets themselves Boltgun Metal. This took a long time, as there are quite a lot of rivets on this thing. I painted some other areas, like the housings around the lights, in Boltgun Metal as well. I painted the lights light blue with a drybrushing of white in the center, and also put some black in on the hoses.

That's about it. After a spray coat of gloss varnish I put a few transfer decals on the inside, and then a spray coat of matte varnish. Here are some pictures.

Monday, June 14, 2010

Shrine of The Aquila

I have assembled my Warhammer 40,000 Shrine of The Aquila terrain kit. I think it turned out pretty well. After assembling it I attached it to a base. You'll want to make sure the pieces are sitting on a completely flat surface when you glue them together, otherwise they'll end up crooked and not sit flat on the base. I glued some leftover pieces, cut up sprue, and small ballast to the base as rubble.

I basecoated the whole thing in black, and then sprayed a coat of grey, trying not to completely cover everything so that a little of the black showed through. This gives it a bit of a textured look. Here are some pictures.
Having never painted a building before, I'm now realizing that I have no idea of how to go about it. Does anyone out there have any suggestions? Should I get a really big brush and a bigthing of light grey paint and give the whole thing a dry brush? Should I make all the beams, rivets, and floor pieces a metallic color, or leave them grey? I'll do the details like the lamps and tubing at the end, but I'm not sure where to begin.

Monday, September 21, 2009

Tyranid Terrain

Between some other painting projects, I finally got around to painting some of the terrain that came with the Battle for Macragge boxed set for 4th Edition Warhammer 40,000. That set came with some interesting extras, and these are the first of them that I've actually gotten around to painting.

Wednesday, March 25, 2009

Small Scale Trees

I bought a pack of Woodland Scenics ready made trees. They come in different sizes and colors. The pack I got was mixed green colors, from 3/4" to 2" tall. They have a chart on the package to equate these sizes to the equivalent sizes in various scales. For N scale (roughly equivalent to 10mm miniatures, which I planned to use these trees with), the sizes equate to between 10' and 27'.

The trees I used can be found here. Woodland Scenics also makes many other varieties of trees, some of which can be seen here.

I based the trees one or two to a 3/4" or 1" square thin metal base. The additional weight of a metal base, as opposed to wood, helps keep the trees from tipping over if they are bumped or when they are positioned on the side of a hill. I took some pictures of the finished based trees on hills next to some 10mm GHQ American Civil War miniatures, to give an idea of the size of the trees in comparison. The pictures also show a couple of the hills I made recently, so you can see how they compare in size to the 10mm miniatures. You can read about how I made the hills here.

Trees Trees Trees Trees Trees Trees Rocks Rocks Trees Trees Trees Trees

Wednesday, February 25, 2009

Making Hills

Today I will be covering another attempt at making scenery appropriate for 10mm scale miniature games. This time it was my first attempt at creating my own hills. If you want to make some the same way, you'll need some cardboard, maybe some styrofoam, wax paper, glue, flock, and the key element: plaster cloth. I found this at Hobby Lobby. It comes in a roll of this loose cloth with plaster on it, and you just wet it and spread it out how you want, then it dries hard. Very convenient.

The first thing I did was to cut a base out of very thin card. Here is a picture of the base for my first hill.
Hill

Then in the middle of the base, I glued a large piece of styrofoam to form the bulk of the hill.
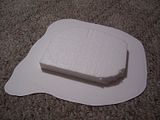
Hill

I found this to cause a bit too steep and uneven of an incline. For future hills, I built up the bulk using many layers of thick cardboard. Each layer was cut in a similar shape as the one before, but about a half inch to an inch smaller all around. This seemed to work better, but made the hills much less steep.

With the large piece of styrofoam in place, I built up the sides and top with newspaper and coardboard to make the hill more rounded.
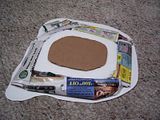
Hill

For the hills after this, I taped or glued strips of wax paper to the stepped cardboard layers to round out the hill shapes. This gave a much more rounded hill. Don't try using newspaper like I did. After you put the wet plaster cloth on the hill, the paper gets wet and collapses. This resulted in a lumpy rather than smooth curvature to the hill.

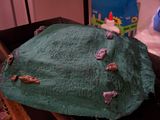
So once that was done, I applied the plaster cloth. I used Woodland Scenics Plaster Cloth. You just cut it into strips, dip a strip into water, lay it on the hill, and smooth it out with your fingers. Keep doing this in strips until the hill is covered, then let it dry overnight. I'd usually put on a second layer the following day just to make the hill sturdier. Here are the results on the first hill.
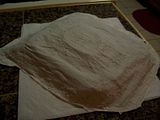
Hill

Another thing to watch for is that while the plaster was drying, it tended to make the thin cardboard base I was using warp a little. So I made sure to put some heavy things all around the perimeter of the hill to hold the base down while it dried and keep it flat. If you can find something more sturdy or waterproof to use for the base that is thin and you can still cut it out in rounded shapes, that would probably work much better. I, however, do not know of anything that fits that description.

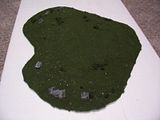
Once the plaster cloth was completely dry, I spray painted the entire hill green.
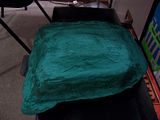
Hill

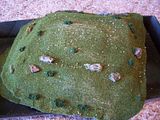
I then glued several rocks around the hill, using them to cover up or distract from places where the shape of the hill looked unnatural. You can see how I created the rocks here. Below are some pictures of the hill with rocks attached.
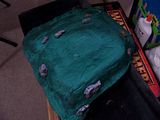
Hill Hill

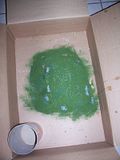
The next step was flocking the hill. I used some watered down Elmers/PVA glue, which I brushed all over the hill before sprinkling Woodland Scenics Green Turf over it. This method did not work very well, and there were large bare patches all over that I had to re-flock, which was very difficult since applying more glue would wash away any flock that was already in that area. Because of this, I had to re-flock the hills several times to get decent coverage. Using some kind of spray glue might work better, but then there is no way to keep it from getting on the rocks. Perhaps flocking with spray glue before putting on the rocks would be best. If you must brush on Elmers glue, water it down as little as possible, just enough to make it brushable. The less watery it is, the better it will hold the flock.

Below are some pictures of the first attempt at flocking the hill. I also sprinkled some ballast on before flocking, (I used Woodland Scenics Medium Ballast) to make the hill look a little rocky.
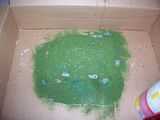
Hill Hill

After a few touch-ups on the flock job, I added some dark green clump folliage all around the hill to look like bushes. Again, I used the Woodland Scenics Medium Green Clump Foliage. This is also another good way to cover up any odd looking spots on the hill, or places that didn't get flocked well. I covered up a lot of the bald areas with some clump foliage, which was much easier than trying to re-flock them.
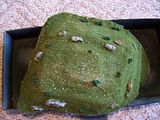
Hill Hill

At this point, I sprayed some matte varnish over the entire hill to hopefully keep the flock, ballast, and clump foliage from coming off over time. And that's all there is to it: one custom made hill. Hopefully this has given you some ideas or inspiration, and you can learn from some of my mistakes. And if you make some of your own, definitely let me know what other things you learn and tips you have for others to benefit from.

Finally, here are some pictures of the other hills I created in a similar fashion, and a couple of rocky terrain pieces I also made.
Hill Hill Hill Hill Rocks Rocks