The Setup
I wanted to try out playing my new Renegade Imperial Guard army that I've been working on, though I don't have much for it yet, and most of what I have isn't painted yet. I managed to just barely scrape together a legal 1000 point army by borrowing a tank from my opponent. It was the Leman Russ variant with the hull mounted heavy bolter, two heavy bolter sponsons, an a twin linked 4 shot autocannon on the turret. It can spew out an impressive number of AP 4 shots, and would be a fearsome weapon against any army but Space Marines. Naturally, my opponent decided to play Space Marines. His Ultramarines, to be more specific.
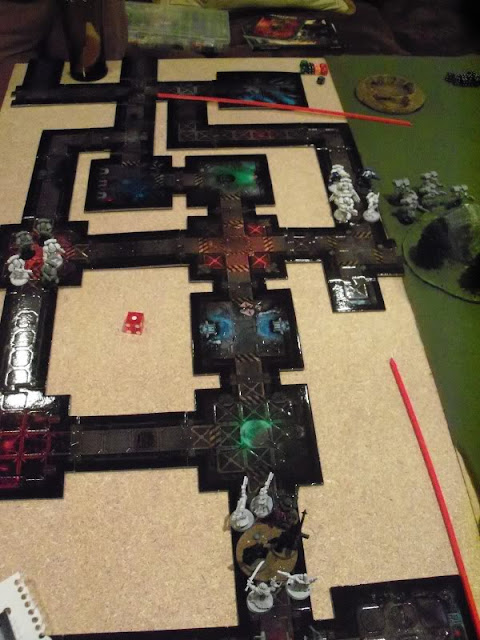
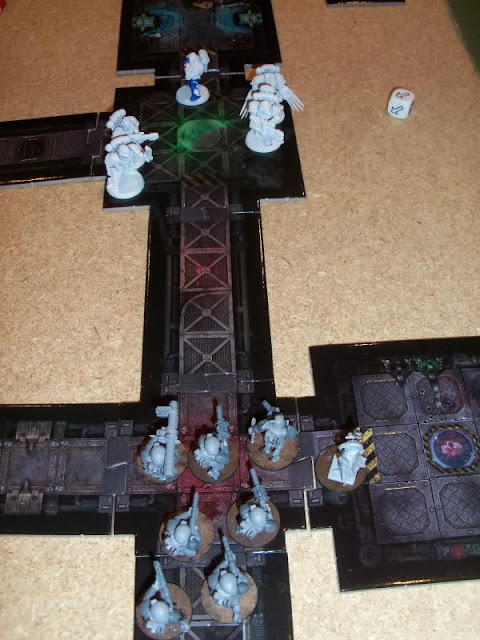
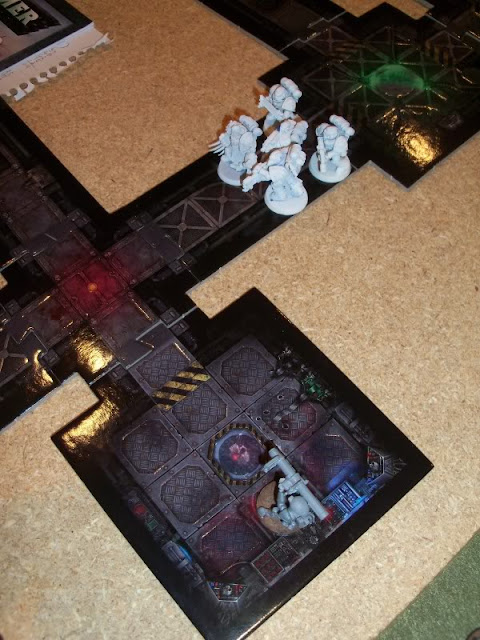
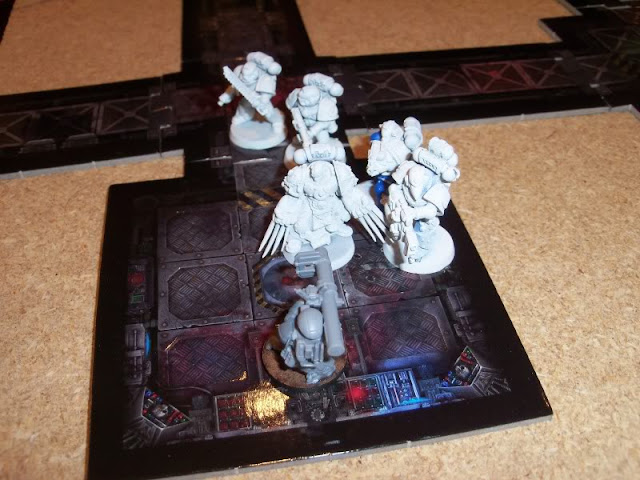
So 1000 points of Imperial Guard against Space Marines. We set up 1/3 of the board with tunnels using the Space Hulk floor tiles. This would represent the tunnel system found beneath the bunker entrance. The tunnels could be entered or exited by the bunker entrance we placed halfway between the long board edges, or units could move onto the table through the tunnels that reached the long board edges.
We decided to use the deployment method where the players each had a long board edge, because it would work the best with how we set the board up. The mission was the one with two objectives, one in each player's deployment zone. Mine was placed inside the tunnels, and the Space Marine objective was outside behind some trees. The Space Marines deployed first, and would get the first turn.
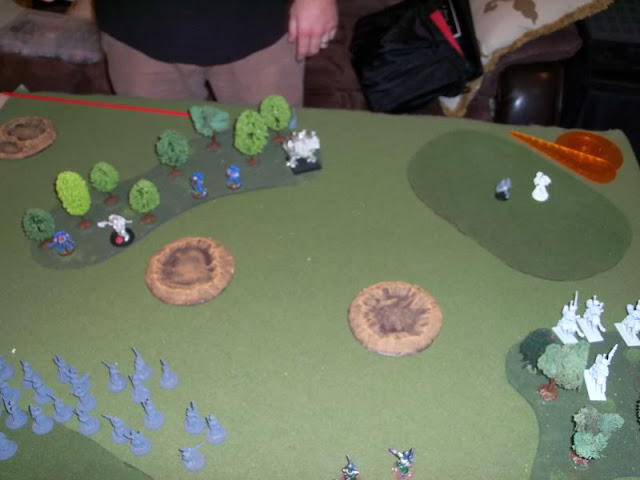
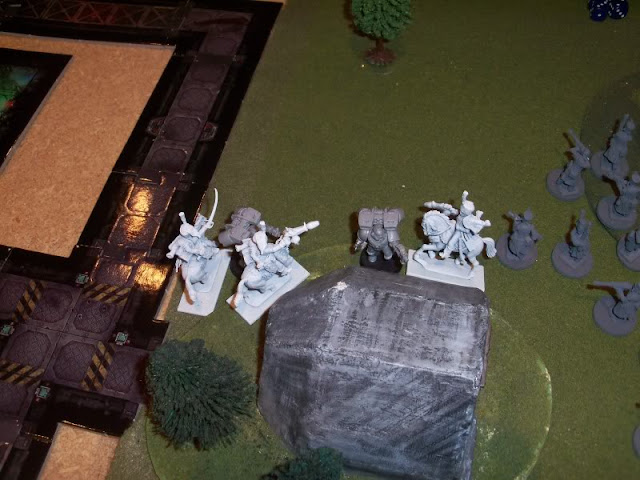
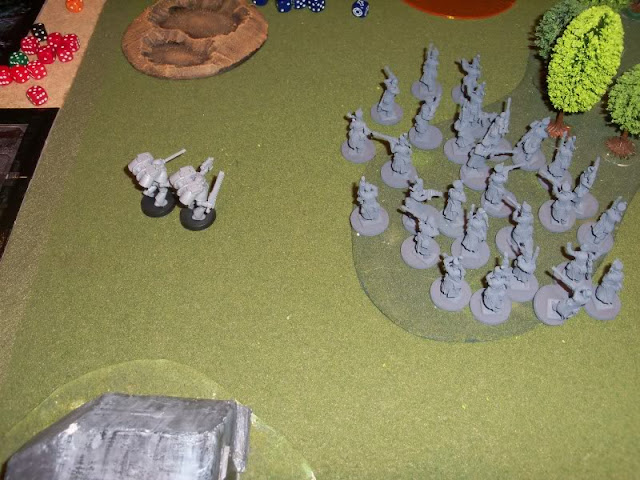
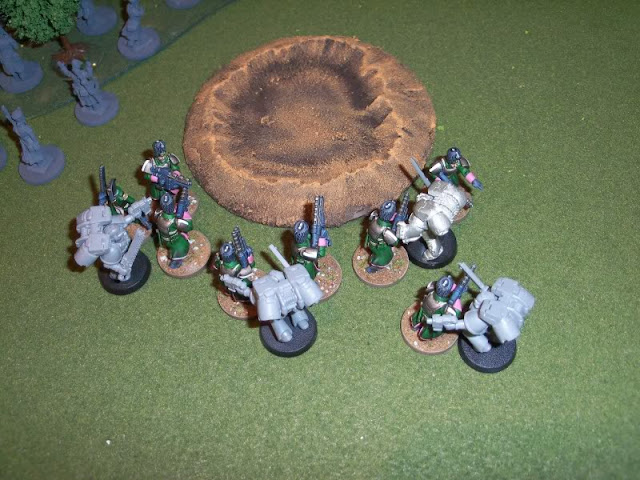
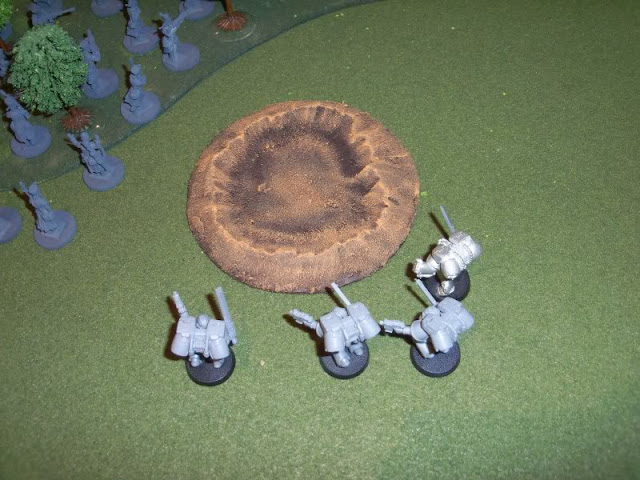
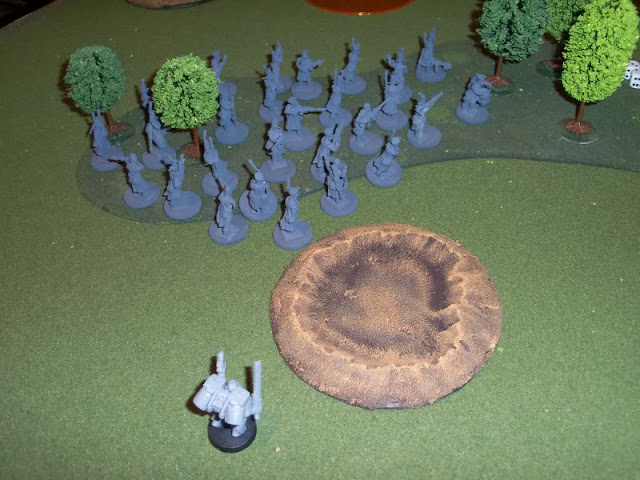
The deployments are shown the the pictures below. Outside the Ultramarines had, from left to right, a combat squad with missile launcher, a Dreadnaught guarding the objective, a combat squad with a Lascannon in the woods, a small assault squad, and another combat squad accompanied by a Terminator librarian. Facing them was a unit of Rough Riders, a Heavy Weapon squad with Heavy Bolters next to the Leman Russ in the woods, a long line (three files thick) of Conscripts in front of two Infantry squads, a Platoon Command squad, and finally another unit of Rough Riders on the other flank.
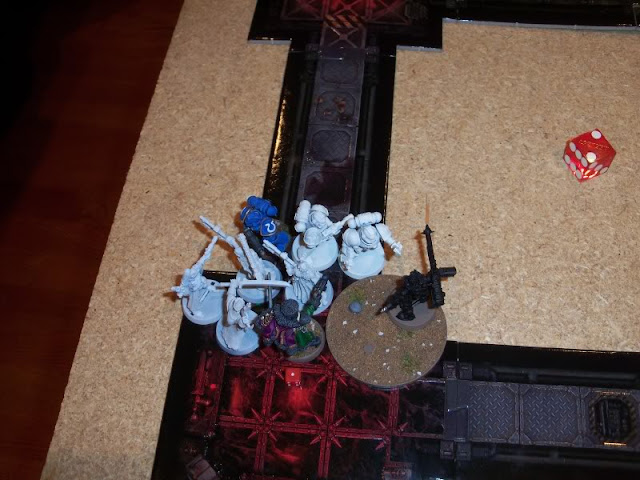
Inside the bunker complex, there was already a combat squad of Marines with a flamer, and a Vanguard squad led by a guy with lightning claws. The renegades only had a unit of Veterans and a Company Command squad protecting the objective to oppose them.
The Story
This would be a lightning raid by the Ultramarines against the renegades to secure some important intelligence from the computer banks in the renegade bunker before the renegades could escape with it. Under a sudden and unexpected attack, the renegades needed to protect the computer banks long enough for either their reinforcements to arrive, or to remove the information to a safe location. At the same time, the renegades needed to deactivate or destroy the Ultramarines locator beacon before the loyalist reinforcements could arrive. If the beacon could be destroyed, it would buy enough time to evacuate the bunker complex before a stronger force could arrive to completely destroy it.
A combat squad and a Vanguard squad of Ultramarines have already infiltrated into the bunker tunnel complex. They will stage the surprise attack inside the tunnels to quickly capture the intelligence before it can be removed or destroyed by the renegades. At exactly the same time they reveal themselves, they have arranged a larger attack outside the bunker as a diversion. This way, most of the forces guarding the bunker will be outside defending against the larger attack, leaving the inside mostly unguarded so the smaller force can complete their mission quickly. After enough time has passed, so that the objective must have either been captured by the Ultramarines or removed to safety by the renegade, a larger loyalist force will use the locator beacon placed by the Ultramarines to locate the bunker and destroy it completely, unless the renegade can disable the beacon in time.
Turn 1
The Ultramarines outside took up their positions unnoticed, and waited for the signal. At the precise moment, they revealed themselves. The assault marines move forward to take up positions near the bunker entrance, and the Librarian took his squad to the edge of the tree line. The rest of the marines opened fire, killing a few conscripts and a few Rough Riders. They did, however, achieve their goal of getting the attention of the renegade forces. Meanwhile, inside the bunker complex, the two Marine squads moved through the tunnels toward their objective.
Most of the renegades outside surged towards the attacking Marines, intent on taking out the locator beacon. The tank and heavy bolter squad in the woods managed to take out three marines in the combat squad with the lascannon. It would prove to be the most successful round of shooting they could have hoped for. The marines must not have had their helmets on yet or something. On the Renegade left, the platoon commander ordered the Rough Riders to run full speed at the assault marines! The haughty cavalrymen ignored the order, and trotted on at a dignified pace. Still, they managed to deftly negotiate the trees in order to assault their enemy. With their hunting lances they took out two Marines, who in turn couldn't kill a single one of the Rough Riders. Obviously they were too distracted by the magnificent display of horsemanship they had witnessed.
Turn 2
The Ultramarines inside continued to move stealthily towards their objective, hugging walls and using every nook available to avoid being seen or fired at. Outside, most of the marine firepower was focused on the four unengaged Rough Riders on the renegade right flank. However, the Dreadnaught and the combat squad with the missile launcher were unable to kill a single one of the cavalrymen due to their being well obscured in the woods. The rest of the marines maintained their position, knowing the only needed to hold off the renegades long enough for those inside to complete their mission. Without support, the Assault marines again somehow failed to kill a single renegade Rough Rider, while losing another of their number to the enemy cavalry.
The determined renegades again surged forwards, the Rough Riders on the right staying inside the woods that had protected them so well so far. The Platoon commander bellowed at the conscripts to fire in ranks, and they actually managed to do it quite well. Their well-timed volleys wounded the Terminator Librarian and took down all but one of his retinue. On the Renegade right flank, shots from the Rough Riders, an Infantry squad, the tank, and the Heavy Bolter squad took out three of the Marines on the hill in front of them. The two remaining decided that discretion was the better part of valor, and chose to fall back in the face of the impending charge of the cavalry.
Inside the bunker, the renegades had finally discovered the presence of the infiltrating enemy. Deciding to take the initiative, the Company commander charged with zeal into the nearby combat squad. He proved to have more courage than skill, not causing any wounds with his power sword, though his squad took out two of the marines without the significant benefit of such a weapon. Meanwhile, just outside the bunker entrance, the assault marines finally got their act together enough to defend themselvs, and managed to kill two of the circling Rough Riders.
Turn 3
The brave sergeant from the Librarian's squad charged madly forward at the Platoon command squad, killing most and gunning down the rest as they fled. And little else happened. Inside, the Company commander again failed to cause any wounds with his power weapon, and this time his squad couldn't pick up the slack, but they still held their ground against the intruder.
Even with their officer lost, the conscripts and the infantry squad behind them continued to surge forward, intent on capturing the beacon. In a hail of lasgun fire, the finished off the brave Ultramarine sergeant and the Librarian. Meanwhile, the combat between the Rough Riders and Assault marines continued to be a complete stalemate, and was no doubt quite an impressive display of fencing ability on both sides.
Turn 4
At this point, some Ultramarine reinforcements turns up, dropping in directly behind the Leman Russ tank. A lucky shot immobilized the vehicle. The heavy bolter squad fired everything they had at the newly arrived Assault marines, but only took out one of them. Elsewhere, the Rough Riders on the renegade left were getting worn down, their horses clearly blown by this point. Another two of them were killed, but the stubborn and proud cavalrymen fought on.
Inside the complex, the Company Command squad just couldn't finish off the combat squad. They lost their nerve and tried to flee, but in the cramped corridors they stood no chance of escape, and where slaughtered. Outside (but unpictured), the two Rough Riders left alive on the renegade right charged the two remaining marines on the hill, killing one of them and losing one of their own.
Turn 5
The recently-arrived Assault marines assaulted the Leman Russ and made short work of it. On the hill on the opposite side of the battlefield, the remaining Rough Rider, who had single-handedly taken down a Space Marine, was unable to repeat the achievement. However, he managed to survive a while longer in single combat with the remaining marine.
Not much longer, of course. The marine finished him off, then fell back away from the approaching Infantry squad. Inside the tunnels, the Vanguard squad and the two remaining members of the combat squad linked up and ran down the hallway towards their objective. The defending Veteran squad fired desperately down the cramped hallway, frag grenades exploding everywhere, but only two of the Vanguard squad were taken out.
Turn 6
With a few bolter shots and a sweep of the Heavy flamer, the Ultramarines in the tunnels killed all but one of the renegade veterans. The remaining veteran fell back into the objective room and shut the door, hoping some miracle (i.e. random game length) would save him and the vital intelligence he protected from the marines. Outside, the assault marines finally finished off the few remaining exhausted Rough Riders.
Turn 7
The reinforcements for either side, expected at any moment, had still not arrived, and so the desperate struggle continued. The remnants of both Ultramarine assault squads charged an renegade infantry squad in the middle of the battlefield, and made short work of them. Meanwhile, the Ultramarines in the tunnels broke down the door to the computer room and made a mess of that last poor renegade veteran. They located the information they were looking for, and so had achieved their objective. All the renegades could hope for now was to take out the locator beacon so that the rest of the base could be evacuated.
The remaining conscripts, who were easily the most valuable unit in the renegade force on this day, fired on the Assault marines, killing all but one. All that remained of the Ultramarine force outside the bunker was that single assault marine, and the dreadnaught.
Unfortunately, the hastily-assembled renegade force didn't include much in the way of anti-tank weaponry. So the brave renegade Infantry squad nearest the beacon charged the behemoth to keep it occupied. They attacked it with grenades, but had little hope of damaging it.
The Result
Unfortunately for the renegades, the dreadnaught could not be harmed, and was just close enough to the beacon to prevent them from deactivating it. (It was pretty much EXACTLY 3" away, so close that you couldn't really tell if it was within 3", so I gave my opponent the benefit of the doubt, counting it as contested.) Though there were no Marines nearby to operate the beacon, neither could the renegades deactivate it in time. In addition, the Ultramarines had retrieved the data they were after, and so the victory this day was theirs.












great report and a great idea for a scenario. Did you just use standard rules for the inner bunker fight ? Oh.... and hussars as rough riders is inspired !!
ReplyDeleteReally nice batrep, thanks for posting it! Now I have to have a bunker fight thanks! LOL!
ReplyDeleteThanks! It was a fun game.
ReplyDeleteWe only had a few special rules for the bunker. To enter or exit the bunker, we required embarking/disembarking, treating the doorway on the outside and the edge of the hallway on the inside as access points. This was simply to prevent an issue of half a unit being outside and half inside. It never came up, however, since nobody attempted to enter or exit the building.
Inside the building, we just considered the edge of the tiles to be a wall that could not be seen or moved through. We also decided that if blast templates scattered through the walls, they would instead stop when the center of the template reached the wall, since it makes sense that a missile or grenade would explode upon impact with the wall, rather than travel through it. Aside from that, we use no rules changes inside the tunnels.