This was the second in a series of two linked multi-player Warhammer Fantasy games. You can read the results of the first battle in my Warhammer Clash of Scouts Multiplayer Battle Report post. I've also posted the scenario rules for this second game, which was the Battle for the Cave Multiplayer Warhammer Scenario which I created based on a multi-player scenario in the Warhammer Fantasy rulebook.
While the remnants of the Dwarf scout force screened the cave, the Dwarf General decided to send part of his army on a forced march through the night in order to get his artillery deployed as quickly as possible. The Elves, not wanting to be surrounded again, sent half of their army on a flanking maneuver to get around the rear of the advancing Dwarf forces. Perhaps uncharacteristically, the Chaos general decided to play it safe and keep his army together, marching at a moderate pace.
Turn 1
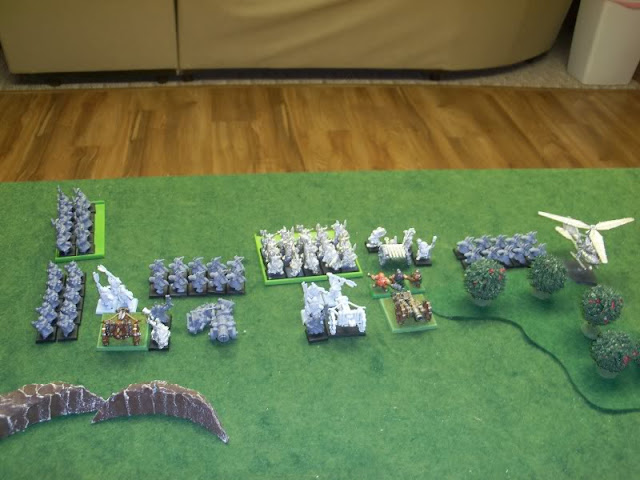
The Dwarf artillery arrived just before dawn and deployed with a field of fire facing the cave opening to deter any of their enemies from approaching it. The remaining scout forces deployed facing the cave but kept their distance. The Dwarfs had a clever plan up their sleeves for capturing the treasure...
Turn 2
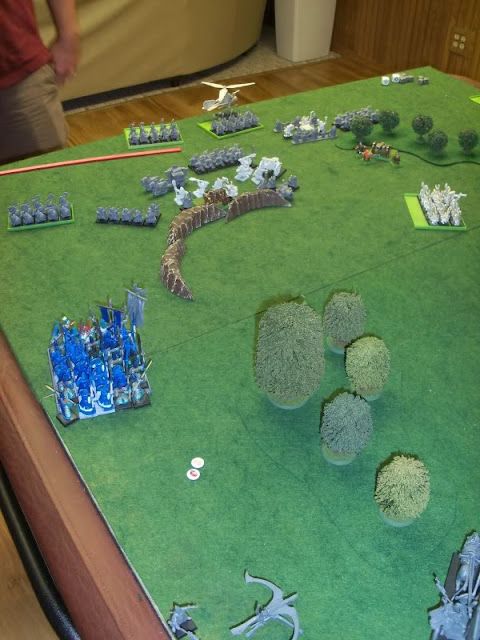
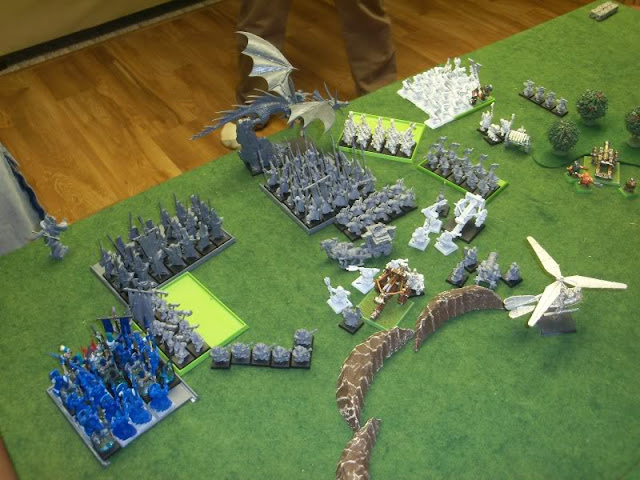
More Dwarfs began to turn up, informing their comrades of the High Elves behind them chasing the rear of the Dwarf army. The Dwarfs spread out their forces covering a lot of area with their many small units, not knowing which direction an attack might come from. The first Elves to show up, however, were to the right of the Dwarf army, and consisted of a large unit of spearmen, a bolt thrower, a lion chariot, and a mighty Mage Lord. Unfortunately, the great wisdom the Mage Lord had acquired over centuries of study did not prevent him from making a foolish mistake and exposing himself to the Dwarf artillery battery. He was quickly and unceremoniously blown to pieces by the Dwarfs, who quickly took advantage of the opportune target.
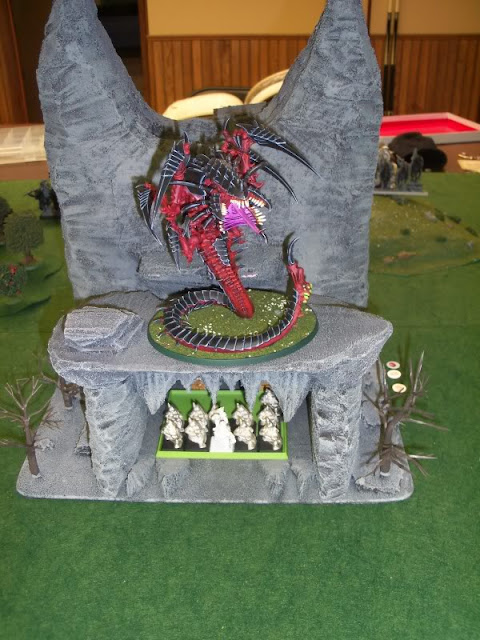
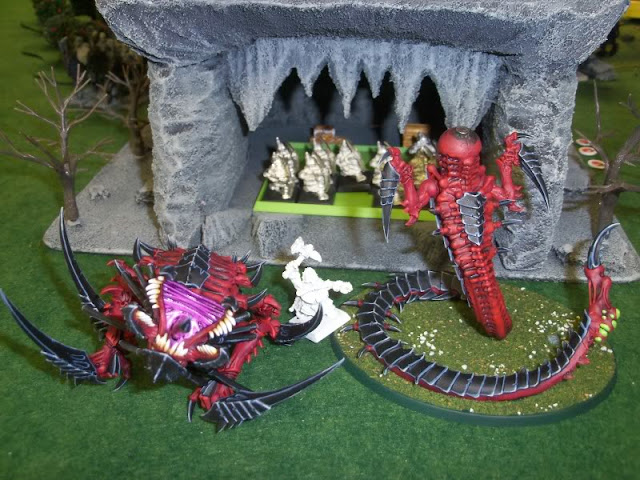
At the same time, the entire Chaos Warrior army arrived on the opposite side of the battlefield from the Dwarfs, facing the back of the cave. They would have a long march ahead of them in order to reach the cave, but their general thought it best to have the large cave between them and the Dwarf artillery. Meanwhile, the clever Dwarf plan was unfolding, as a unit of Miners who had been sent to tunnel into the cave arrived safely at their destination. Having reach the cave containing the treasure horde, they quickly discovered that, of course, it was guarded by a dragon! Though surprised by the unexpected encounter with the ferocious cave dragon, the Miners fought back with courage and ferocity. Four of their number fell, but they severely wounded the strange-looking dragon, and none thought of fleeing.
Turn 3
The entire Warriors of Chaos army advanced in haste, but its right flank was held up by a unit of knights slowing down to traverse the nearby wood. Some of the High Elf flankers sprung their trap, as a unit of Swordmaster and large unit of Spearmen appeared in the Dwarf rear. A few Dwarfs were prepared for the envelopment and got off a few crossbow shots, but it had little effect. The Dwarfs now had three large, imposing, and powerful units of High Elves in their flank and rear. In the cave, the dragon became overwhelmed by the sudden and brutal attack of the Dwarf Miners. It was unable to defend itself from their renewed attack, and the Dwarf Hero leading the miners finished off the monster, smashing it right in half with his hammer. With the treasure's guardian defeated, the Miners consolidated their position in the cave, ready to defend it to the last.
Turn 4
In the Dwarf rear, more units were turning up every minute. A large unit of Dwarfs joined the battle, but so did a Dragon mage, and another High Elf mage on foot. A brave unit of Dwarfs with great weapons, though in a a hopeless situation, decided to go out gloriously and charged High Elf Spearmen, only to be flanked by the Swordmasters. They could only hope that their sacrifice would provide some time for the rest of their army to reorganize. The other unit of High Elf spearmen charged a small unit of Dwarfs with crossbows, the only thing between the High Elves and the Dwarf artillery battery. Meanwhile, the Warriors of Chaos continued their advance, the right flank again slowed by the woods and units getting in each others way.
As a small consolation, the Dwarf artillery battery just barely managed to kill the Dragon mage and his dragon. However, the Dwarfs with great weapons were wiped out, and the Dwarf crossbow unit lost three of their number and fled. As a result, the crew of a nearby Bolt Thrower panicked and fled. The High Elf Spearmen followed through into the heart of the Dwarf artillery battery, charging the Bolt Thrower directed by the Dwarf Master Engineer and army general.
Turn 5
Both the High Elves and Dwarfs found it difficult to maneuver in the hectic scrum that had developed in the midst of the Dwarf battle line. However, the High Elves with their large, powerful units easily bested the mostly small units and war machine crews of the Dwarfs. The Dwarfs still had one large unit and a couple war machines left, but most of the rest of their force was scattering. What little hope remained was no doubt dashed as yet another large unit of High Elves with spears showed up, moving in to finish off the scattering remnants of the Dwarf army rather than trying to reach the cave, which the Dwarf Miners still held. Meanwhile, the Warriors of Chaos continued their long, slow advance towards the cave, so far taking little part in the battle.
Turn 6
The stalwart Dwarfs rallied most of their units, but they were small and spread out, and the Dwarfs struggled to form a coherent defense with the large Elf units in their midst. The Swordmaster drove off a unit of Dwarfs with Greatweapons. The Dwarfs still had one large unit and some artillery in reserve near a wood, and another strong at the base of a nearby hill keeping an eye on the cave entrace. At this point, the Chaos Warriors joined the battle, charging into a combat between High Elf spearmen and Dwarfs with crossbows, killing many on both sides in the three-way combat. The Dwarfs fled, but the High Elves held their ground. A lone, apparently suicidal Marauder Horseman charged another unit of High Elf spearmen and was rewarded with the swift death he was clearly seeking.
Turn 7
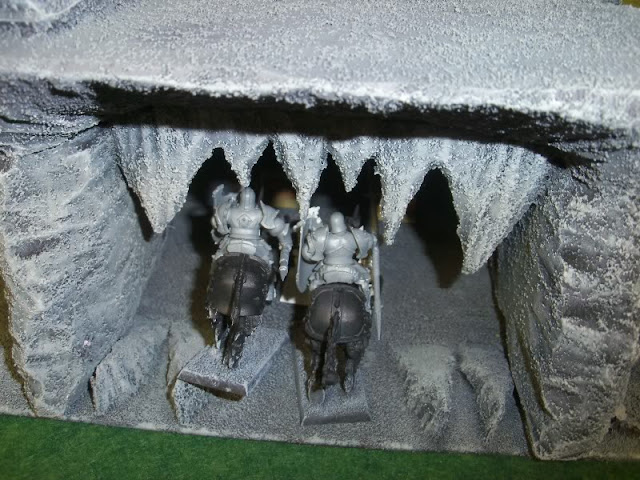
As the battle was nearing its end, the bulk of the Chaos Warrior army finall reached the cave, moving around it on either side. There wasn't much time left, as the Miners had secured most of the treasure by this point, but a unit of Chaos Knights positioned itself for a charge into the cave. The Dwarf unit at the base of the hill was prepared to charge the Knights to prevent them from assaulting the cave, but a spectacular shot from the far-off Hellcannon annihilated the entire unit. The stunned hero who barely survived the blast vengefully fired his pistol at the nearest enemy, the Chaos Knights. His shot took down one of the knights, but with the Knights now free to assault the cave, that shot could make the difference between victory and defeat. Elsewhere, the other unit of Chaos Knights defeated and drove off the High Elf spearmen, and reformed facing the cave opening, giving the Chaos army another unit that could assault the Dwarf-held cave.
Turn 8
The last remaining large unit of Dwarfs was destroyed by the High Elf spearmen and Swordmasters, leaving their army mostly destroyed. The Dwarf gyrocopter bravely sacrificed itself to buy more time to secure the treasure by charging one of the Chaos Knight units, and helpfully a unit of High Elf spearmen also charged them. That left the Chaos army the one unit of four Chaos Knights to assault the Dwarf Miners holding the cave. This was the only chance left to snatch victory from the Dwarfs. They charged in, killing most of the Miners, through the remaining Miners and the hero killed two of the Knights. Despite the heavy losses, the Dwarfs were determined to hold the cave.
Final Battle
The grinding battle at the mouth of the cave continued. The remaining Miners were cut down, leaving only the lone Dwarf hero to defend the treasure. It came down to a single combat between the Dwarf hero and the one remaining Chaos Knight. The Knight fought ferociously, badly wounding the Dwarf. Fighting through the pain, and no doubt motivated by visions of all the treasure he was fighting for, the Dwarf Hero struck a mighty blow that sent the Chaos Knight tumbling to the rocky cave floor, where the Dwarf finished him off.
In the cave, only the Dwarf hero remained able to fight, but the time they spent in the cave was enough to secure most of the treasure horde. Many Dwarfs had been sent through the tunnel the Miner's had dug to transport away the treasure that the Miner's had secured. The Dwarf hero, along with the surviving wounded Miners, went back through their tunnel along with the Dwarfs who had been sent to carry away the treasure, leaving the largely intact High Elf and Chaos armies to fight each other over the remaining scraps. The Dwarf army was mostly shattered, many Dwarf lives and war machines alike had been lost, but the legendary treasure horde was theirs.










I thought Warmachine crews cower now instead of fleeing...
ReplyDelete